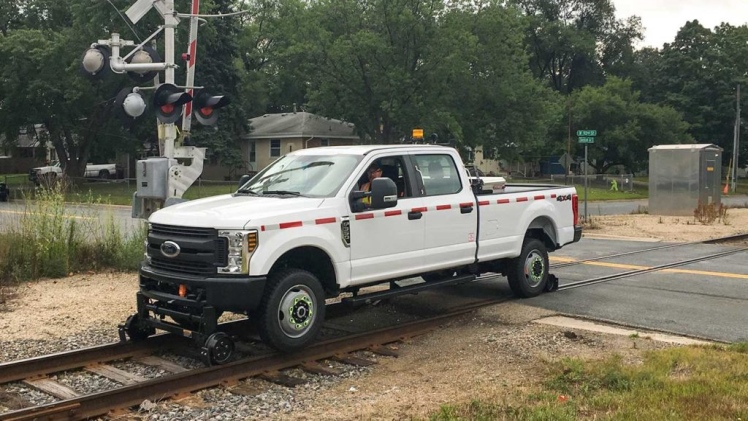
Highway + railway = hi-rail trucks are dual-mode vehicles capable of traveling on both railroad tracks and roads. Hi-Rail trucks have rubber tires in addition to a set of folded steel wheels that, when deployed, allow the vehicle to travel on railroads.
Roadway tires or a hydraulic system could generate pressure, depending on the system. The flanged wheels roll free most of the time. Steering is not required due to direct control, which depends on rail construction. To avoid the possibility of derailing, steering locks are installed. Get a Hi-Rail Truck Rental.
Safety Measures:
Wearing high-visibility clothing (such as a vest, sweater, or coat) can help ensure that the person positioning the high-rail vehicle on the rail and the person assisting will be noticed by any potential approaching traffic.
To protect your hands and head from harm, such as cuts or bumps on the head, you should also wear gloves and a hard hat. Being hit by either one of them might result in serious injury or even death; hence, it is important to be careful when positioning a Hi-rail vehicle on the rail.
Introduction:
This tutorial shows you step-by-step how to align a railroad high-rail car so that it may go over the track. If these instructions are followed, there shouldn’t be any risk of harming or derailing the truck when it is placed on the rail.
This will be useful to every railroad employee in carrying out their responsibilities effectively. Additionally, new hires might use it as a teaching tool. Get a Hi-Rail truck rental for your project.
Materials list:
gloves high-visibility clothing (vest, sweatshirt, shirt, coat)
a hi-rail truck with the necessary hi-rail hardware
Hi-Rail Truck Rental
How to Mount a Railroad Hi-Rail Vehicle
Step 1: Turn on the strobe light and rail gear pump inside the car by flicking the switches found on the dashboard next to the radio.
Step 2: On the road, keep an eye out for approaching cars, and on the nearby tracks, keep an eye out for trains. Once everyone is clear, move the hi-rail car along the specified track so that your wheels are parallel to the rail.
Step 3: When the back hi-rail gear is lowered, it should be aligned such that the hi-rail wheels’ flanges will rest inside the rail’s ball.
Step 4: Lower the hi-rail gear onto the rail by pulling the red handled pin and pressing the “down” button at the same time.
Step 5: After the rail gear has been lowered, check to see that the hi-rail wheel’s flange is seated inside the rail’s ball.
Step 6: Align the front hi-rail gear such that when it is lowered, the flange of the wheels will fit the rail within the rail’s ball.
Step 7: The front hi-rail gear has a separate pin that has to be pulled. Pull the red-handled pin while simultaneously pressing the “down” button to lower the front hi-rail gear onto the rail.
Step 8:Ensure that the hi-rail wheel’s flange is seated inside the rail’s ball after the rail gear has been lowered. The next stage is to conduct a braking test after securely securing the truck. This test will determine how far the car can stop on the rail.
Conclusion
Get a Hi-Rail truck rental from your nearest provider. Choose the vehicle wisely. and follow the instructions.

