We try to load everything we need, such as cell phones, cameras, etc., via the cigarette lighter socket of the van, with the classic USB adapter when we are traveling (engine running).
Remember that if you realize later that you need more energy, you can take a larger or a second battery to be connected in parallel with the other.
The fridge is one of the appliances that consume the most, so if you plan to use it often, I recommend you take a compressor fridge. The Dometic CFX is the best, even if they cost a lot.
Well, now that you have a clearer idea about the battery that’s right for you, the next question you will surely ask yourself will be
How do I charge the battery? You have three possibilities:
- Via solar panel
- Via alternator
- Via battery charger (when you can connect to a 220v socket)
SOLAR PANEL (PHOTOVOLTAIC)
The solar panel allows you to transform solar energy into electricity you can use for your purposes.
There are 3 main types of solar panels:
Monocrystalline
Polycrystalline
Amorphous
Let’s see the differences between the different types hoping to help you figure out which is best suited to your needs.
MONOCRYSTALLINE PANEL
The monocrystalline panel has the highest efficiency, about 19%, in optimal sun conditions, with the sun perpendicular. This high-efficiency level is given by the purity of the silicon crystals that constitute it and their ordered arrangement.
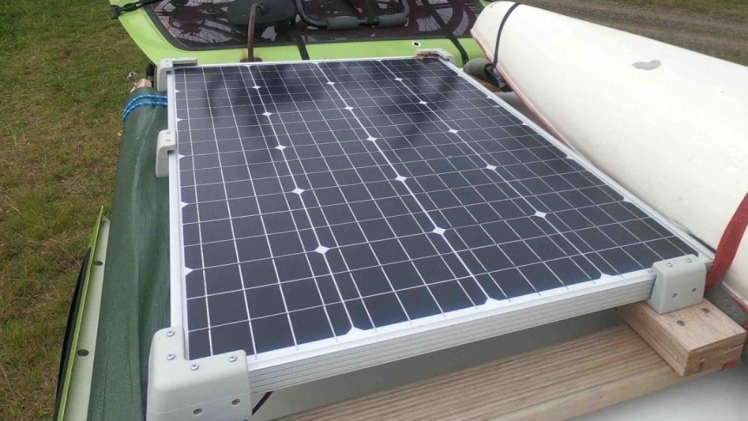
You recognize it because the cells are square but with rounded corners (see photo).
The strong point of this panel is its high efficiency when the sun’s rays hit it perpendicularly. It is also its “weakness.”
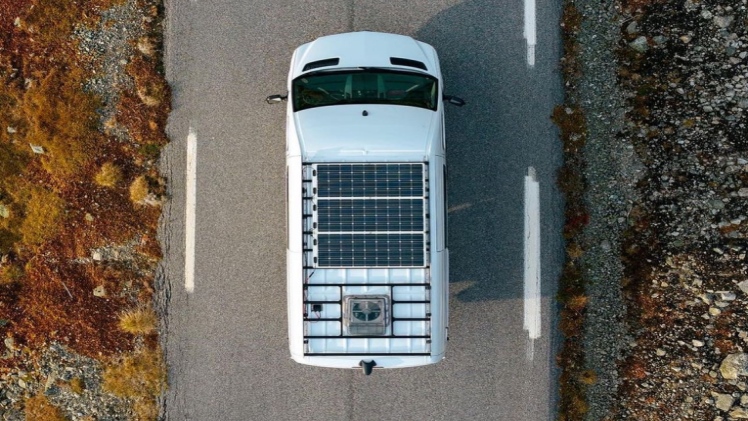
By installing the panel on the roof in a horizontal position, it becomes almost impossible to have the rays hitting it perpendicularly throughout the day. Consequently, you are unable to exploit the high performance to the maximum.
The optimal solution would be to build a structure that allows you to vary the angle of inclination of the panel to follow the sun when you stop.
Another disadvantage of this type of panel (and the polycrystalline) is that if it is partially in the shade or covered by some leaves, it has a big drop in performance because the circuit is interrupted (so be careful where you park!). We have installed a monocrystalline panel like this.

POLYCRYSTALLINE PANEL
This type of panel has an efficiency of about 16% (lower than the monocrystalline) and has a slightly larger footprint. You recognize it because the cells are perfectly rectangular and not with rounded corners (as monocrystalline has instead).
Although the efficiency is lower than the monocrystalline, the fact of having the crystals arranged in a disordered way allows the polycrystalline panel (such as this one) to work better than the monocrystalline with oblique sun rays (a very common situation when it is installed on the roof of a van), therefore throughout the day.
For this reason, it is the most used type of panel and is often recommended to be installed in motorhomes.
Also, like the monocrystalline, if it has dirt on the surface or is partially in the shade, it greatly reduces its efficiency, so pay attention to where you park and if there is anything that can give it shade.
AMORPHOUS PANEL
Unlike the previous ones, this type of panel works best in the shade and overcast skies, even with non-direct light.
The problem is that it has a much lower efficiency than the previous ones (about 6-8%) and that for the same amount of Watts of a monocrystalline or a polycrystalline, it occupies a much larger surface (which we hardly have available on the roof of our half). In fact, for example, an amorphous panel like this of similar dimensions to the previous ones has a capacity of 40W (therefore less than half) and costs 150euro.
Conclusions
The best solution would be a monocrystalline panel fixed on a semi-mobile structure that allows you to tilt it when you stop to position it perpendicular to the sun to make the most of its efficiency.
However, since this is a somewhat laborious and not always feasible solution, especially for vehicles with a high roof, I recommend polycrystalline, which has good efficiency and works well even with oblique sunlight.
The amorphous has the advantage of being efficient in any light condition but has very low efficiency and requires an excessive amount of space to be mounted on a van (especially if you have portholes or antennas that do not allow you to occupy the whole roof. ).
HOW TO CHOOSE THE POWER OF THE SOLAR PANEL
Once you have chosen the panel type, you need to understand the capacity you need.
Solar panels differ not only by type but also by power, therefore, Watt. Now you have to figure out how many Watts you need.
We can make an example using the daily consumption value calculated in the battery dimensions paragraph, which is 434 watts.
It would help if you calculated how many hours of sunshine per day you will have to charge your panel (consider the hours of high and intense sunshine).
Divide the value of your daily consumption calculated previously by the estimated hours of sunshine.
This is an estimate, it all depends on the destinations of your travels, and it will change a lot if you plan to go to Sicily in July or England in November!
Returning to the example, suppose we estimate an average of 5 hours of sunshine per day. We apply the formula Estimated daily consumption/hours of sunshine.
434W / 5 hours = 86.8 watts
In this case, a 90-watt panel might be enough.
But be careful because there are a lot of variables that come into play when it comes to solar panels! Your estimate will necessarily be approximate because you cannot predict the weather and the destinations of all your upcoming holidays, so you should calculate at least 20% more than the value resulting from the calculation.
I recommend starting with a panel of at least 100-160watt, and if you realize that it is not enough for your use, you can add another one later.
Now that you may have understood the differences between portable solar panels for RV, it is time to understand how to make the most of their energy.
And here, another device comes into play, the charge controller and, for a change, there are various types, and you have to understand which is the most suitable.
CHARGE REGULATOR
A charge controller is an essential tool that allows you to adjust the voltage supplied by the solar panel and adjust it.
The correct one is needed to charge the battery without damaging it.
There are two categories of charge controllers, PWMs and MPPTs.
PWM
The PWM charge controller is much cheaper than the MPPT because it is less sophisticated. It simply regulates the voltage from the panel by lowering it to the level suitable for charging the battery (less than 14.7V).
The disadvantage derives from the excess energy produced being wasted and not reused. Here is the lowest price!
MPPT
The MPPT charge controller is more sophisticated (and expensive) than the previous one; it can fully exploit the energy produced by the solar panel (W).
Unlike PWM, this regulator can exploit excess energy, increasing the current (A) that goes to the battery and thus exploiting the solar panel’s power up to 95-98%.

I explain this concept better with some formulas.
Power (W) = Voltage (V) x Current (A)
Where power and voltage are fixed values because:
- The power (W) is that of the panel you buy (100,120,160,200Watt etc.)
- The voltage (V) is the maximum at which the battery can be charged without damaging it
- The only value that can vary is the amperage, the current delivered. And this is where the big difference between the two types of regulator is created: the MPPT regulator increases the current to maintain the panel’s maximum power while minimizing waste, while the PWM keeps the amperage unchanged, thus wasting excess energy.
Conclusions
If you use solar as your main energy source to charge your batteries, invest and get an MPPT regulator. For example, if you have a lot of free parking and need your batteries to recharge as much as possible every day, you should take an MPPT regulator.
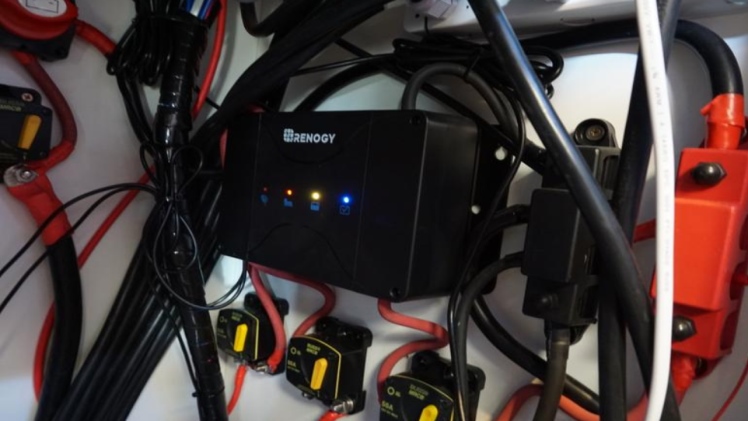
If, on the other hand, you decide to install the solar panel mainly to keep the batteries charged (and therefore prevent them from being damaged) when you are not using your vehicle or when it is in storage (uncovered, therefore in the sun) and on vacation, you often go to campsites where you can connect at the 220V column, a PWM charge controller (like this one) is sufficient.
If you change your mind, you can decide to switch to an MPPT at a later time.
Have you already figured out which regulator to buy? Perhaps you have oriented yourself towards a category, but now you have to do another calculation to understand how to choose the regulator based on the amperage.

